
In-House VILT Courses
In-house VILT courses allow you to easily distribute live training to your department online.
To create an in-house VILT course, click on “In-House VILT Courses” on the left-hand toolbar.

Add a new in-house VILT course by clicking the green button.
![]()
The first step will be to add course information. Click on “+Add Course Information.”
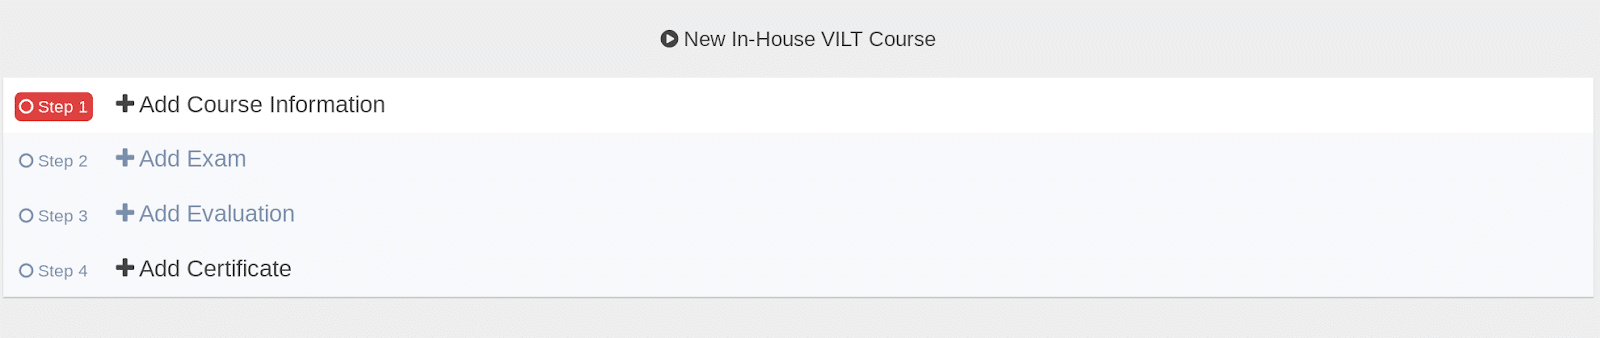
Fill out your course information. Make sure “Appears in Live Course Calendar” is checked. You will also need to add at least 1 accreditation.
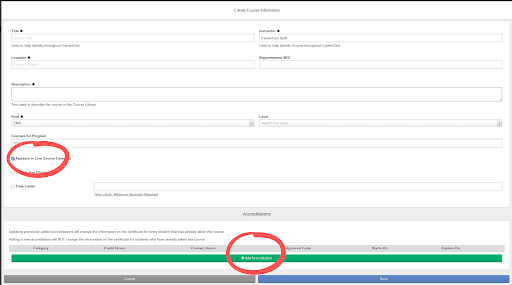
If the class is not accredited at a state or national level, you can make your accreditation category “Administrative/MISC” and use contact hours instead of credit hours. Once you are finished, click save.
Next, click on “Add Exam.”

Create your exam and fill out the necessary information.
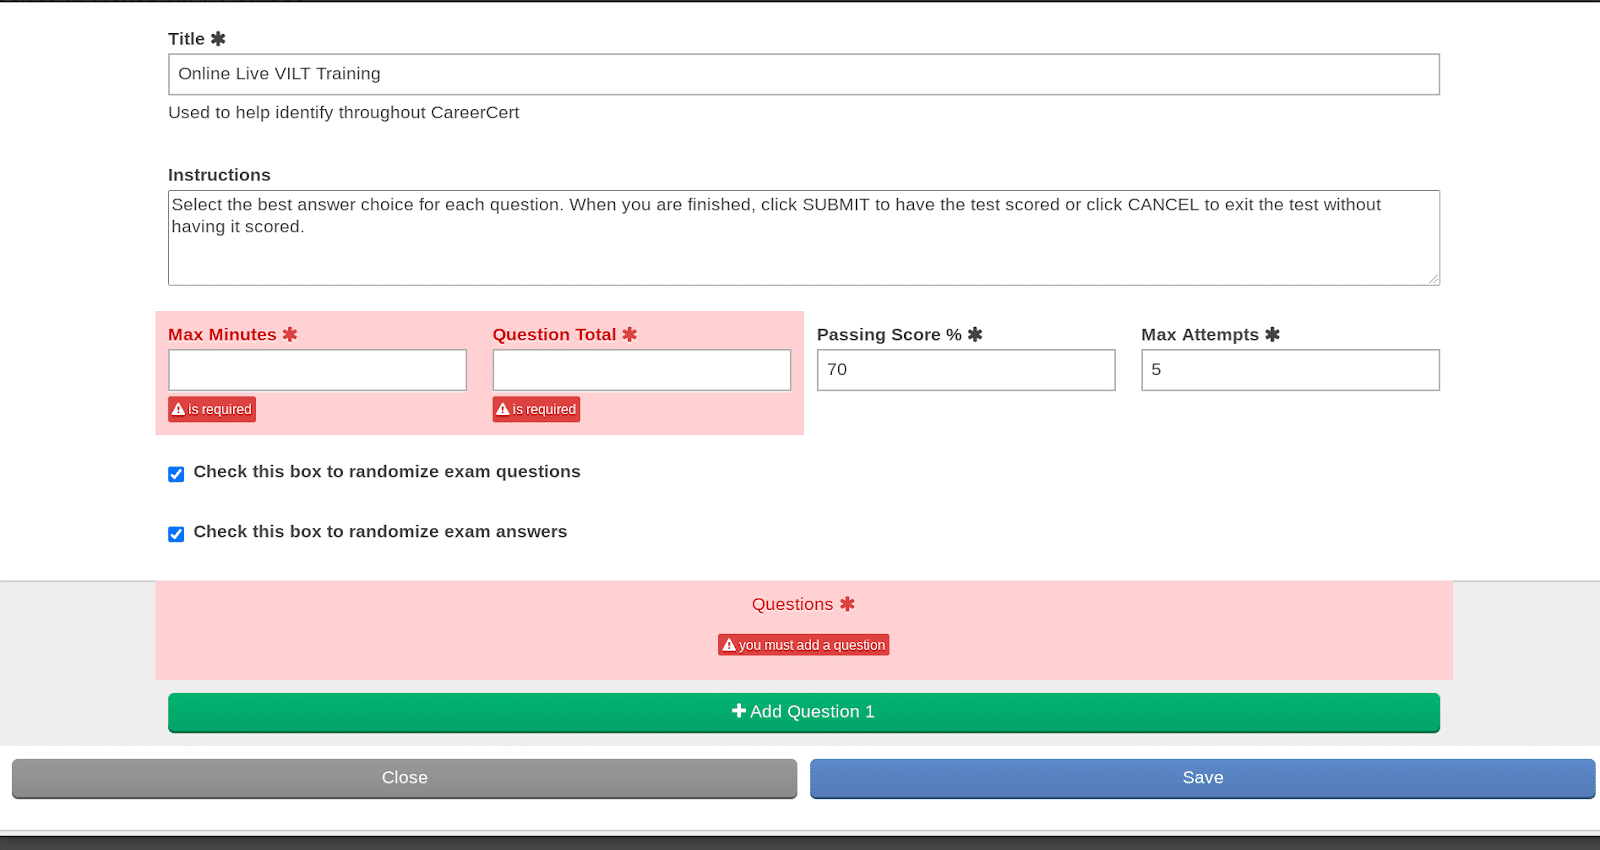
For help creating an exam, please visit our help resource on in-house exams.
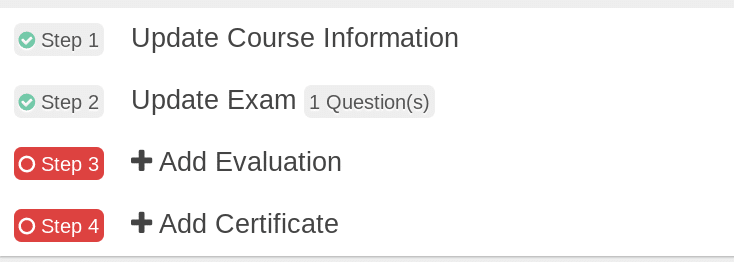
Finally, you will need to add an evaluation and certificate from your existing evaluations and certificates.
For more information on how to set up certificates and evaluations using the CareerCert platform, please visit our help resource “Certificate and Evaluation Templates.”
Once you have finished the above steps, click on “Show in Live Course Calendar” and “Show When Creating a Schedule.” These options will turn blue. This allows you to add them to your schedule.

Next, click on “Schedule Live Course” from your admin menu.
Click on the green “New Course Schedule” button to create a new course schedule.
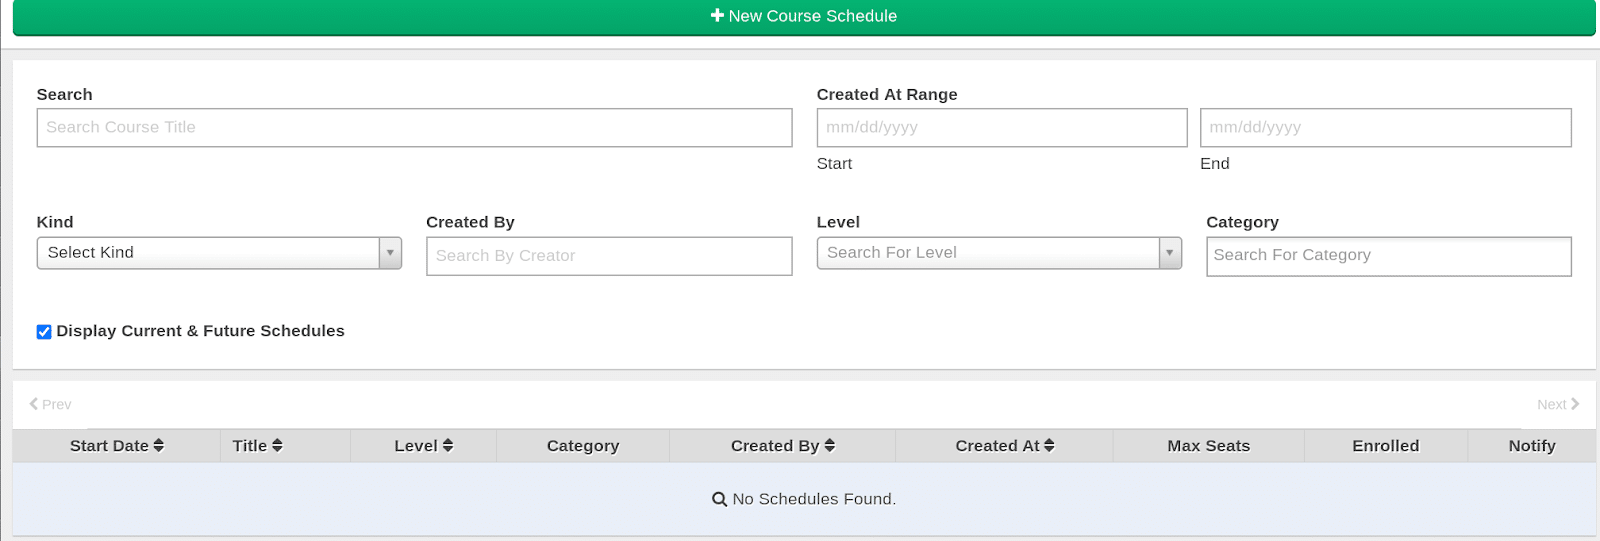
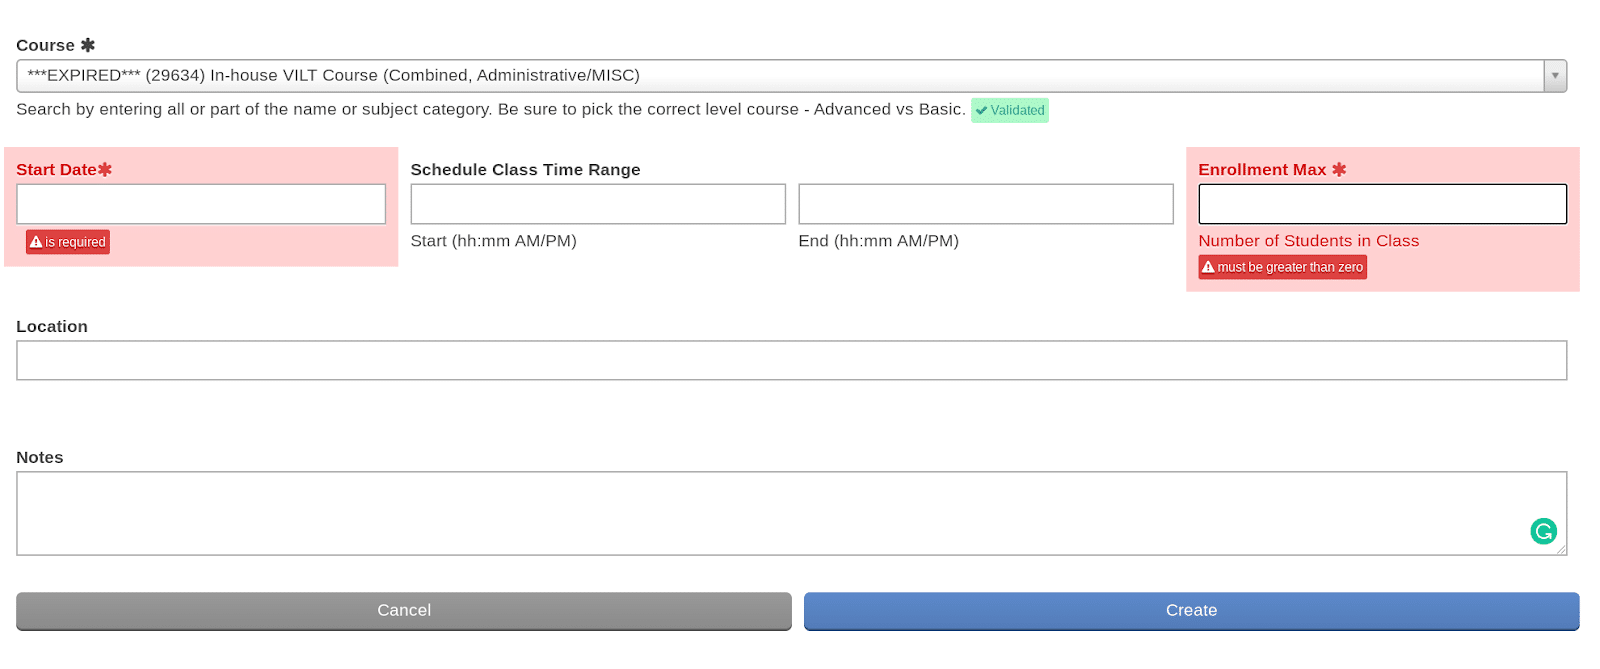
Search for the live course you created and set up the dates, time, and number of personnel who can attend. For in-house VILT courses, this should not be more than 50. The location can be set as anything. The notes field will show up when personnel enroll in the course.
You will now see your new course schedule in the “Scheduled Course” list. Click on it to continue setup.
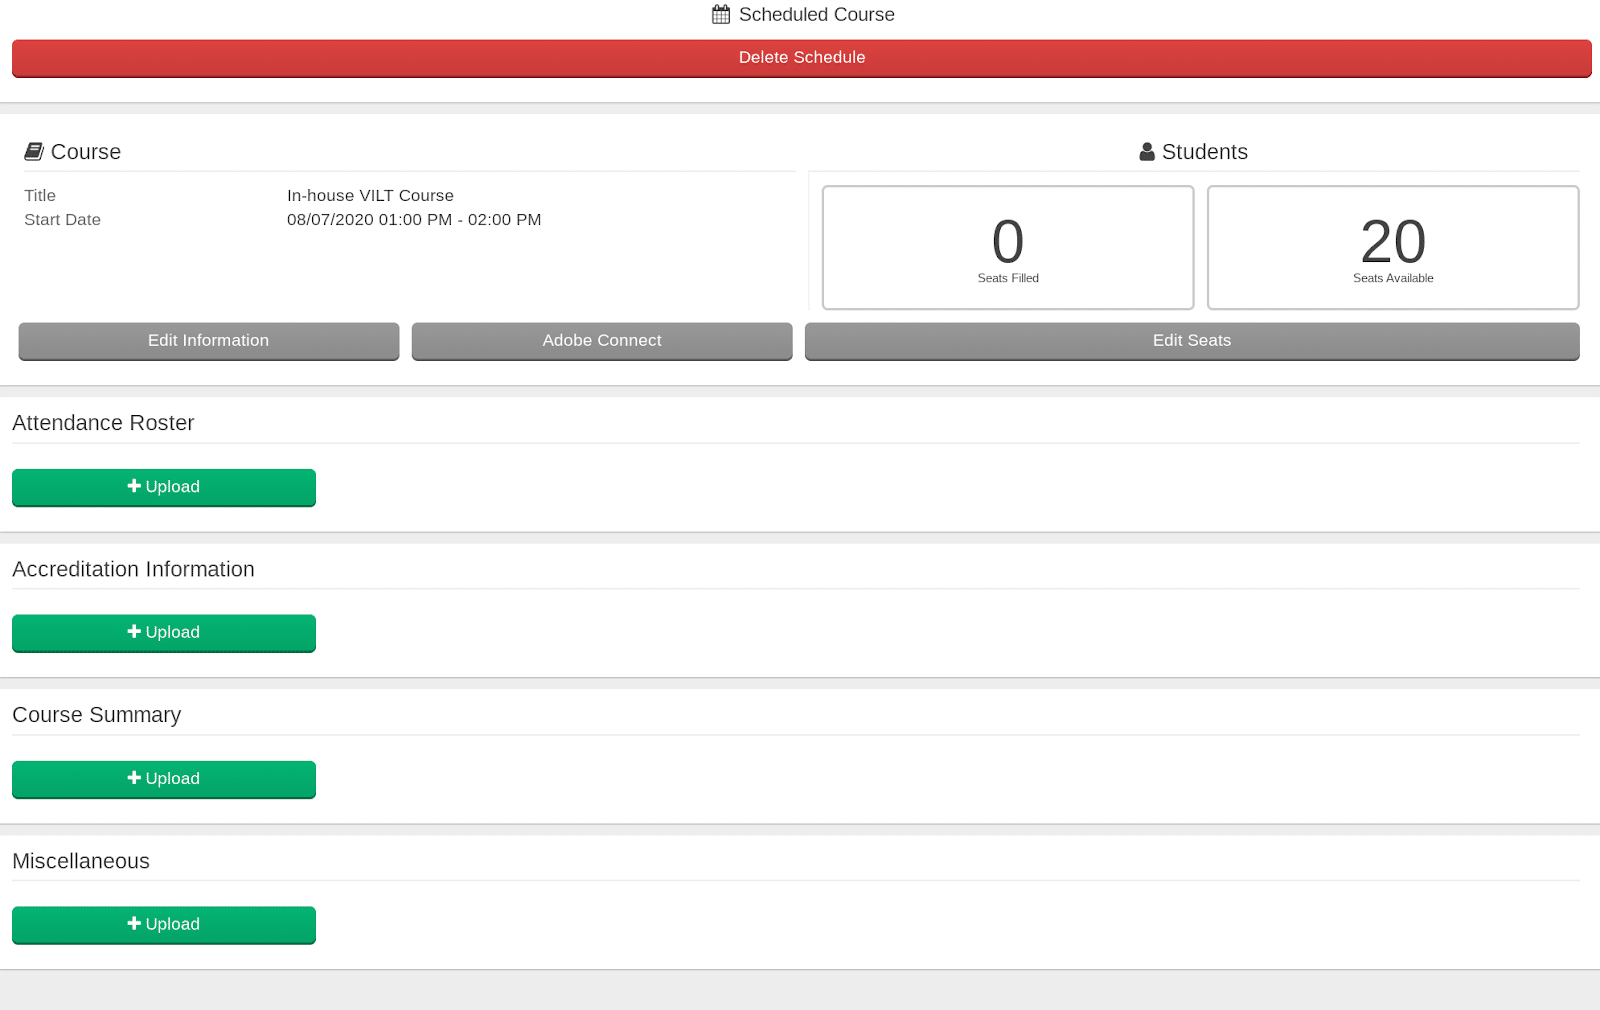
From this screen you can edit information and edit seats, which allows you to add or remove personnel from your online training.
Click on edit seats to add personnel.
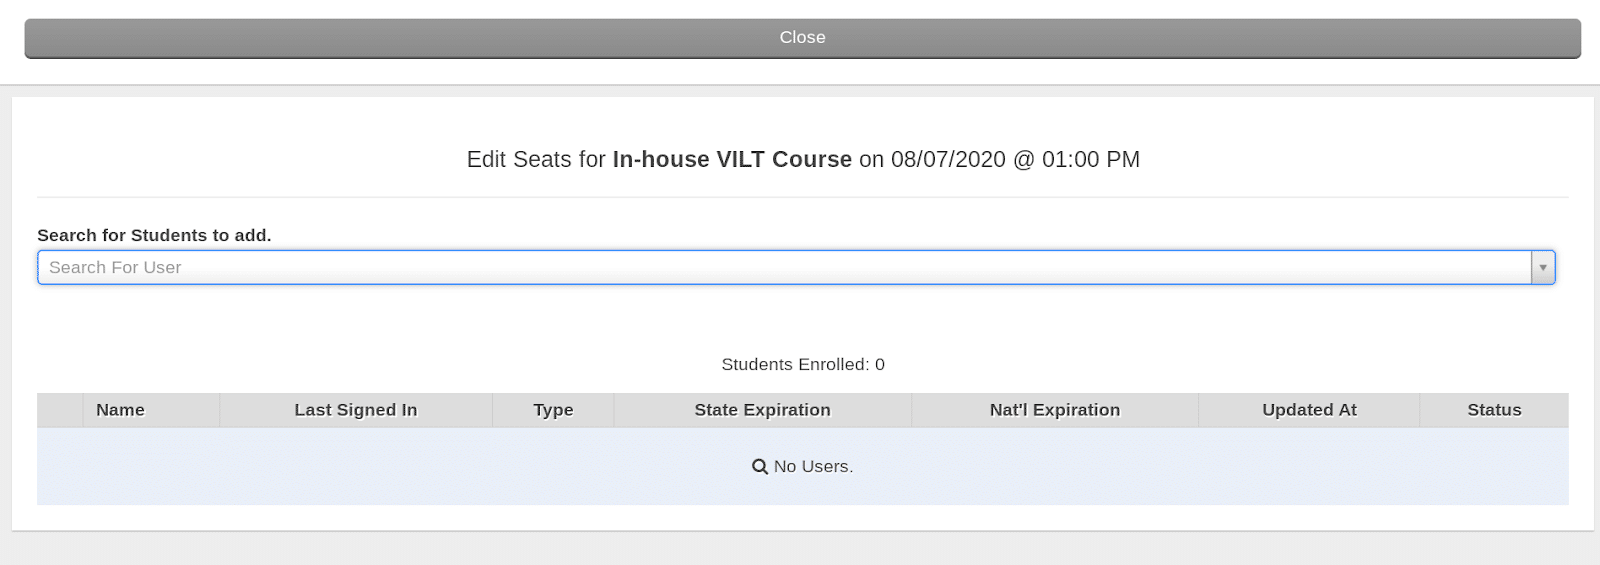
From here you can add the personnel who need to take your course. You will need to add them one by one. Alternatively, your personnel can enroll in the course themselves via the “Live Course Calendar” tab. (See more information below)
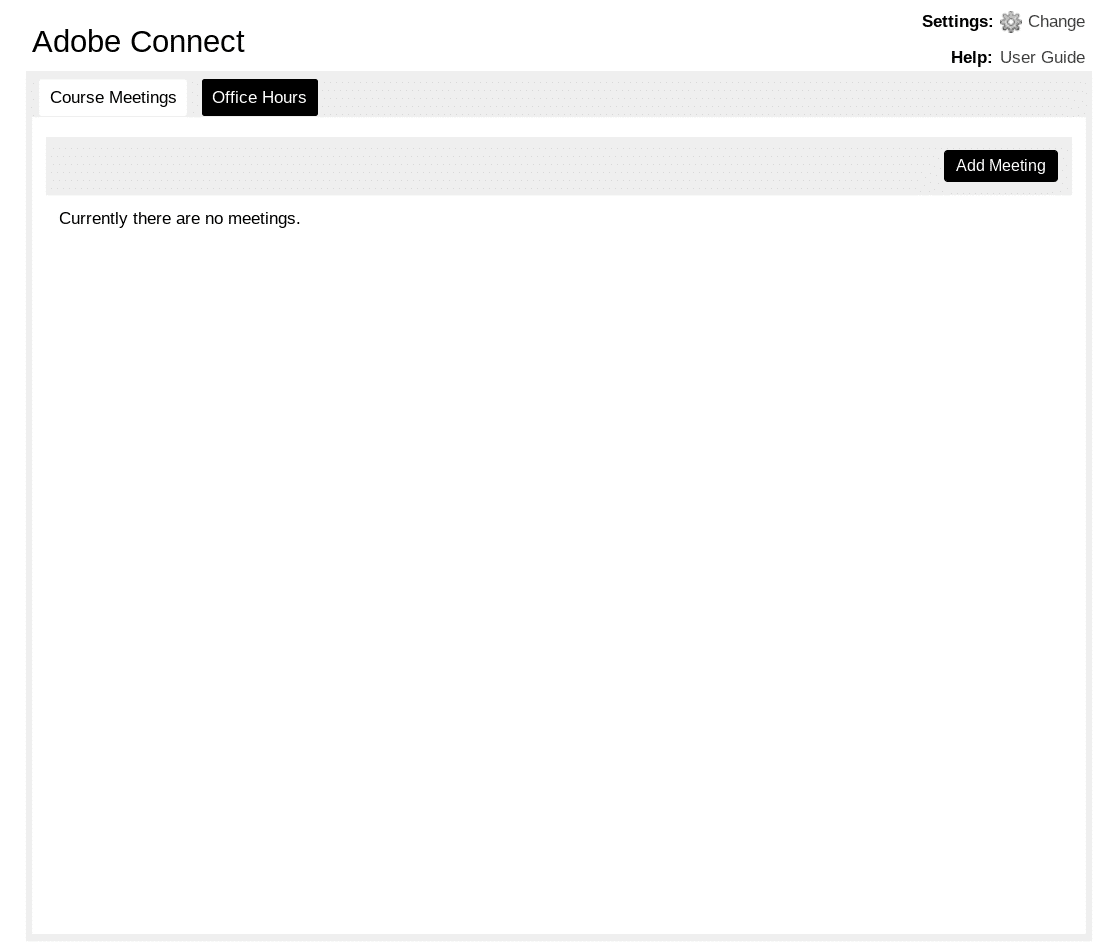
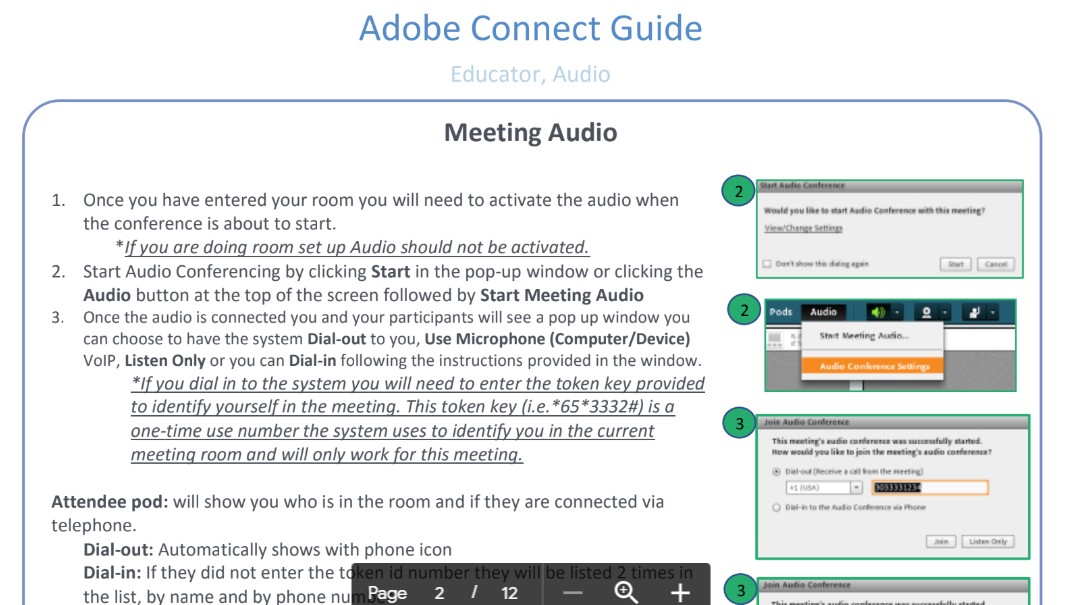
Next, click on “Adobe Connect.” This feature requires an Adobe Connect license that you can get through CareerCert. Please reach out to your sales representative or customer success manager to purchase.

When you are setting this up for the first time you will want to click on “Add Meeting.”
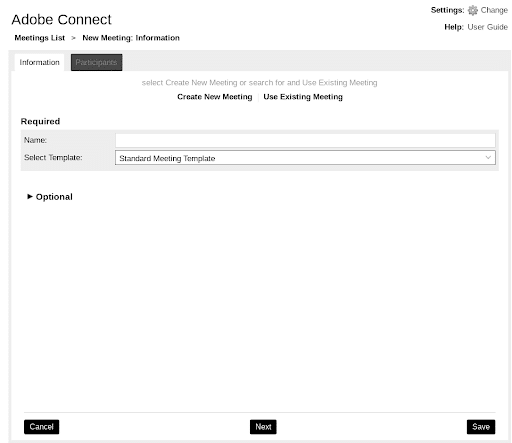
Name your course and select a template. If you have not created a template, select “Standard Meeting Template.” Then click “Save.”
Click on “Click to Close” to exit this area.
Adobe Connect
You will now want to login to Adobe Connect at https://careerstep.adobeconnect.com. You may be prompted to download Adobe Connect.
When you are logged in, click on “Content” in the header bar.

Next, click on “New Content.”
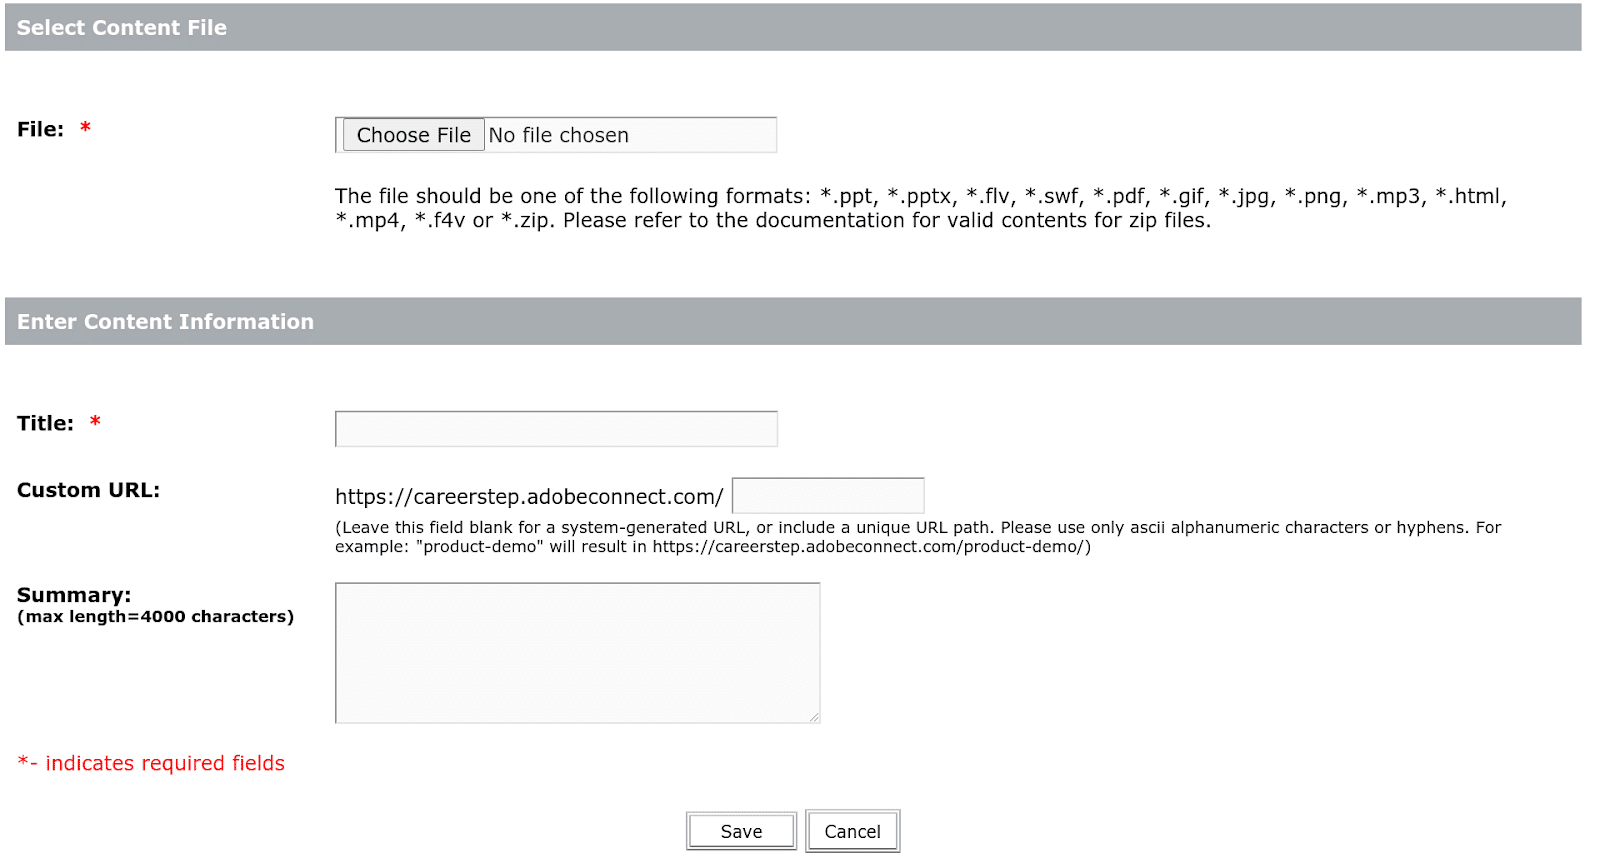
Choose the files you would like to upload. This will be the content you want to share in your class. This content will now be available for all in-house VILT courses you create.
Before you start your class, you can navigate to the classroom by going to “Schedule Live Course” in the CareerCert platform. From there you can click on your course and click the “Join” button. Doing this ahead of time will allow you to prepare the classroom.
Once you have entered the classroom, you will be able to pick the layout you want and will be able to add files and content that you uploaded to Adobe by selecting “My Content.” The following document will help you with the options inside the Adobe Connect classroom: Download now.
For Personnel Who Will Take the Live In-House Course
For personnel who want to enroll in the class but were not added by you during setup, they can search for the class under the Live Course Calendar tab.

Here they can search for the course by title.

The class will appear underneath the search bar.

They can then click on the class and enroll.
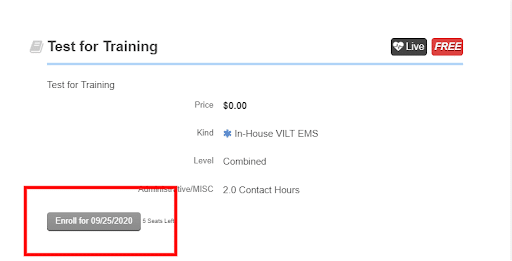
When the class is starting, your personnel will need to click again on the “Live Course Calendar” button.
Now they should see the course listed in their calendar.
![]()
Clicking on the course will launch the interface. They will click “Join” to take their seat in the virtual classroom.

As the class host, you will see them as they enter the virtual classroom.
When your class has ended, you will come back to your “Schedule Live Course” tab and click on the class. If there are personnel on the roster who did not attend, you can remove them under the “Edit Seats” option. Once the roster matches who attended the course, you can click on “Activate Exam.”

Once the exam is activated, your personnel will navigate to their “Live Course Calendar” and will click on the course. They will see an “Exam” button, which they can click to take the exam.
If you have any questions, please reach out to your customer success manager for additional training.